Simplifying Staining
- clear stain
- Deck
- deck finishing
- finishing
- old stain
- peeling stain
- purluxe
- re-finishing
- refinishing
- sikkens
- staining
- translucent stain
By Graham Bailey
UBC Wood Products Student
What are you Finishing?

Deciding what finish to use on your deck, siding or fence can be one of the more confusing choices that you have to make when you build with cedar. Do you go with a translucent or solid stain? What brand is best to use? How long does your lumber have to dry before you stain it? What about pressure treated material? What do I have to do before I can throw the first coat on, and how many coats do I need?
We get it. It’s confusing. But that’s why we’re here; to cut through the brochure marketing, and help you choose the best product, use it the right way, and get the most out of your cedar products, from start to finish.
Part 1: Cedar Decking

Finishing a New Deck
Preparation
Let’s walk through the ideal way to stain a new, uninstalled deck. For starters, we’re going to talk a little bit about wood-moisture interactions. The number one reason that wood of any kind cracks, warps, cups or that the paint or stain on a given board peels or bubbles is water. Wood can take on or loose water depending on the environment it’s in, and it can do this in a matter of hours. This means that there is no hard and fast rule about allowing your lumber to dry outdoors. It is different for every environment and every piece of lumber. Saying a week to six weeks is completely arbitrary. That said, there is a way to know for sure. Purchasing a pin-less moisture meter is a cheap, effective way to determine the moisture content of your deck prior to staining.
Once we understand how water interacts with your deck, the rest is easy. Unlike the drying time, there are some rules and steps that apply to finishing your deck regardless of its environment.
Decide what type of stain you want to use, and determine if it needs to be applied to all six sides of the deck.
- Spray the lumber with water.
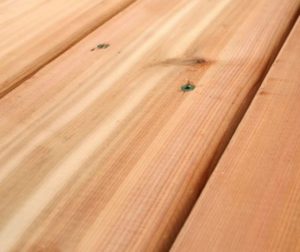
- Apply a solution of 4 ounces TSP, 1 quart liquid bleach, and 3 quarts water. Allow the solution to sit for 15-20 minutes and then scrub with a hard bristle brush. This will remove any weathering or “mill glaze” from the surface of you deck, allowing the stain to fully penetrate. Do not allow the solution to dry.
- Spray the decking with a pressure washer, set to a maximum of 500 PSI, 8-12 inches from the surface of the deck. This should not visibly peel or remove material from the deck. If you see that you are removing significant material from the deck, turn the pressure down, move back, or spray at a shallower angle.
- Allow the wood to dry. Ideally we want a moisture content of 12% to 18% or lower. Use a pin-less moisture meter along the length of the board to determine the moisture content. Make sure the moisture meter is set to cedar.
- After the decking has dried, sand with 60-80 grit sandpaper. Remove dust as you go.
- Apply your stain as soon as possible, to take advantage of the work you’ve put into preparing the deck. Generally, steps 2 through 6 will have to be repeated if the deck is left to weather for more than a week.
Think of a new deck as a first impression: you only get one shot at doing it right. Take a little extra time, use a higher quality stain, and you’ll thank yourself the next time you finish your deck.
Re-Finishing an Old Deck

Preparation
Refinishing a previously stained surface is where most deck owners get tripped up. There is generally a bit of confusion as to what needs to be done, and what condition the deck needs to be in before fresh stain is applied, as well as when a deck should be re-finished.
One of the advantages of stain is that it allows a deck owner to choose when they want to re-finish. Because stain penetrates the material, it won’t peel off when it needs to be refinished, unlike a building finish such as polyurethane. The finish will fade slowly over time, and when it gets too faded for your liking, that’s when you re-finish.
For the most part, follow the steps above for finishing a new deck. The only real difference is that the old finish needs to be removed from the surface. In the case of having a stain on a surface which is peeling, a chemical stripper should be used in place of the TSP solution which will have very little effect on a peeling finish. The goal here is to completely remove the old finished with a chemical stripper, rinse, sand, and let it dry a couple of days. This will expose or “loosen” some wood fibre so that the new stain has something to take hold of. The colouration from the old stain doesn’t need to be completely removed from the wood if you’re using a similar pigment. If you’re going with a finish that is a completely different formula, you’ll want to remove as much of the old finish as possible. Again, the main goal is to “rough up” the surface so that the stain has a chance to penetrate into the material.
Translucent Stains

All of the Sikkens translucent stains that we sell are oil based with an added pigment. Oil based stains tend to work better on cedar decking because they soak into the wood
We sell two different top of the line Sikkens ProLuxe finishes here at Sunbury Cedar; Cetol SRD RE and Cetol DEK FINISH.
Cetol SRD RE (Alkyd and Linseed Oil)
Cetol SRD is by far our most popular deck stain. Its low price, high-quality alkyd solution, and easy one coat application make it the go to for refinishing and decks that have already been installed. It is also better suited for decks that are within 2 feet of the ground.
Cetol DEK FINISH (High Solids Alkyd)

Cetol DEK FINISH is our top of the line oil based translucent deck stain. Its high solids alkyd solution is one of the best penetrating stains on the market, which in turn makes it one of the longest lasting stains available. It has a bit of a higher price when compared to the Cetol SRD, and it needs to be applied to a deck with at least two feet of separation from the ground. Cetol DEK FINISH also needs to be applied in two coats on all six sides of the deck board. By applying the stain to all surfaces of the board, the amount of moisture that can move in and out of the wood can be minimized. By reducing moisture exchange, the board will be less likely to warp, split or decay over the life of the stain.
What to Avoid
For the most part, if a deck finishing product sounds too good to be true, it probably is. Anything that you apply to your deck without removing the old finish or that “builds” on top of the lumber is likely to fail very quickly. The surface oils in cedar won’t allow the finish to bond with the lumber, which allows moisture to get between the finish and the deck, resulting in a failed finished that peels quickly.